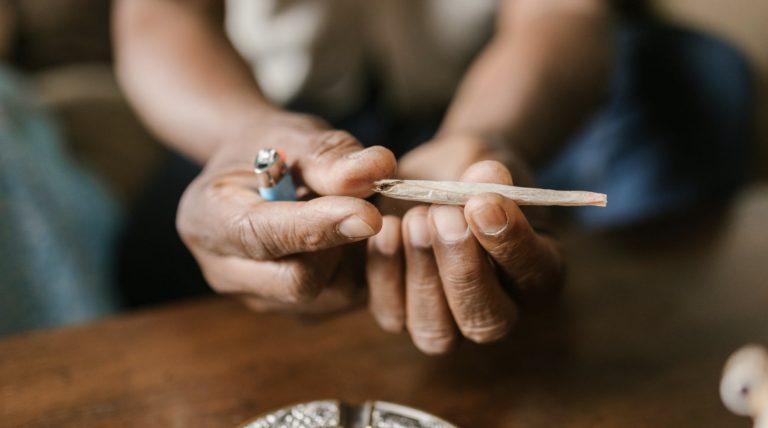
You’re ready to spark up, but you don’t have anything to smoke out of. Now what?
You could put together and makeshift pipe out of an apple or paper towel roll, but is that really going to make your weed taste good? Definitely not.
If you want to enjoy a flavorful, smooth smoking experience, you need to learn how to roll a joint like a pro. To help you out, we’ve created this article with the best joint-rolling tips!
Read on to learn everything you need to know about rolling a joint.
Story Stages
1. Rolling a Joint With the Right Papers
Rolling a joint starts by getting the right papers. You’ll need to know what material and size you’d like the rolling papers to be.
One of the best joint-rolling materials is rice paper. Rice burns nice and slow, and it’s easy to roll up. However, if you’re looking for a more flavorful experience, you should definitely check out hemp wraps.
Hemp rolling papers have grown in popularity, and for a good reason too. The paper has a pleasant taste, and it’ll complement the natural terpenes in your bud. Since you’ll be using mashed-up marijuana leaves, you’ll be getting the full entourage effect.
Are you smoking for medicinal purposes? Then check out flax rolling papers.
Flax seeds support your immune system, and now they come in rolling paper form. These all-natural flax papers are versatile, healthy, and easy to roll.
2. Rolling Papers Sizes
Are you rolling a joint to smoke on your own? Or will you have a group of friends to share with?
The size of your rolling paper will play a large role in how long it lasts. Standard sizes include a single wide, which is 1 1/4 inch wide. There’s also the king size which is 1 1/2 inch large.
Many cannabis enthusiasts enjoy using standard-size papers because they’re easy to find. You can also cut the paper if it’s too large and prefer a smaller joint.
Every brand of rolling paper is going to have its own unique benefits. You can also use a premade option like Secret Nature Pre Rolls. Prerolls help you eliminate any guesswork when choosing paper sizes.
3. Prepare Your Rolling Space
Now you can set up a clear area for rolling your joint. The last thing you want to do is to try to roll a joint with clutter around and lose some of your precious flower.
One of the best ways to clear an area is by designating a rolling tray. You can buy an official rolling tray from a smoke shop or even a local dispensary.
However, there are a lot of household items that can make perfect impromptu rolling trays. For instance, if you have a large hard-covered book, you can use it as a tray,
Just steer clear of flimsy flat materials such as folders or really thin paper plates. Thin surfaces are more likely to bend, making your bud fall off of the tray. Whereas when you have a hard surface, it’ll be easy to break up all of your weed and keep it in a nice clean pile.
4. Grind Up Your Bud
You’ve already got your joint rolling station ready; what’s the next step? Grinding up your bud!
If you’ve never ground up weed before, you’re really missing out. Grinding up your flower helps release terpenes and THC crystals. The result is a more aromatic and intense smoking experience.
Another reason to grind up your weed before rolling a joint is that it makes the weed more smokable. Large chunks of weed will be difficult to pull through, no matter how wide your joint is.
Whereas finally, ground flower will create a smooth, consistent smoking experience. You’ll be able to draw nice long hits without struggling with the joint.
5. Putting It All Together
Alright, it’s time to roll up! Use your middle finger, pointer finger, and thumb on each hand to gently hold the joint paper.
You probably won’t need to use all of the flower you ground up in one joint. Instead, sprinkle in a little bit of bud until the joint paper is covered, but not too full.
You don’t want to add so much ground-up flour that it’s falling out of the paper. Less is more when you’re rolling your first joint.
Reposition your hands so that the joint paper is back between your middle finger, pointer finger, and thumb and positioned right in front of you. Using your thumbs, slowly begin to manipulate the paper up.
Make sure you’re doing all of this over the joint rolling tray. You’re bound to spill a little weed the first few times, it’s a part of the learning process.
You should be making a rolling motion with your thumbs moving up while pressing down and tucking in with your other 2 fingers. Once the joint is fully rolled, you’ll need to lick the top edge of it to seal it. Leave a tiny bit of space at the tpp since this is the side you’re going to light.
You can use a thin pencil or pen to help pack down the bud in your joint. To pack down the bud, gently push it until it moves down a little bit. Then, if necessary, sprinkle in a bit more ground-up flower.
Repeat the packing process until the joint is full. Just be sure to not pack the bud down too much. Otherwise, it’s not going to burn smoothly.
Start Practicing Your Joint Rolling
Now you know everything there is to know about rolling a joint! Since buying your papers is the first step, go ahead and get a pack today. Think about what size paper you’ll need, and then pick a material that you’re excited about.
Remember, rice papers are among the most popular and easy-to-find joint papers. Once you have your paper, you can have fun practicing your joint rolling skills.
Be patient, and before you know it, you’ll be rolling joints like a pro! For more pro tips, read another one of our articles.